

V2Ray DNS on HTTP Custom VPN
Welcome to our comprehensive guide on setting up V2Ray DNS on HTTP Custom VPN. If you’re looking for a way to enhance your internet security and privacy, you’ve come to the right place. This step-by-step tutorial will walk you through the entire process, ensuring that your online activities remain private and secure.
Table of Contents:
- Introduction
- Step 1: Download HTTP Custom
- Step 2: Launch HTTP Custom
- Step 3: Check Necessary Boxes
- Step 4: Set Up V2Ray DNS Settings
- Step 5: Enter V2Ray DNS Code
- Step 6: Configure Sloan Settings
- Step 7: Connect the VPN
- Step 8: Save the Configuration File
- Conclusion
- FAQs
Introduction
Welcome back to our blog! In this post, we’ll guide you through the process of setting up V2Ray DNS on HTTP Custom VPN. For more help and guides, visit our website by searching “12_5 tech” in any browser. Let’s get started!
CREATE V2RAY SLOWDNS SERVER
If you haven’t created a V2Ray DNS account yet, please check out our previous tutorial.
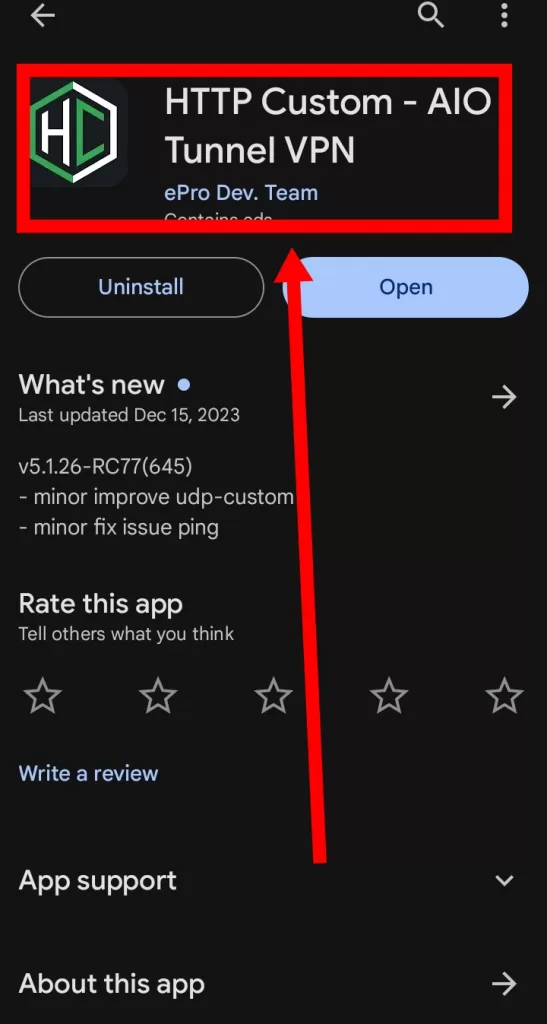
Step 1: Download HTTP Custom
First, download the HTTP Custom app from the Google Play Store. Simply open the Play Store, search for “HTTP Custom,” and install the app.
Step 2: Launch HTTP Custom
Once the installation is complete, open the HTTP Custom app. This will be your main interface for setting up the VPN.
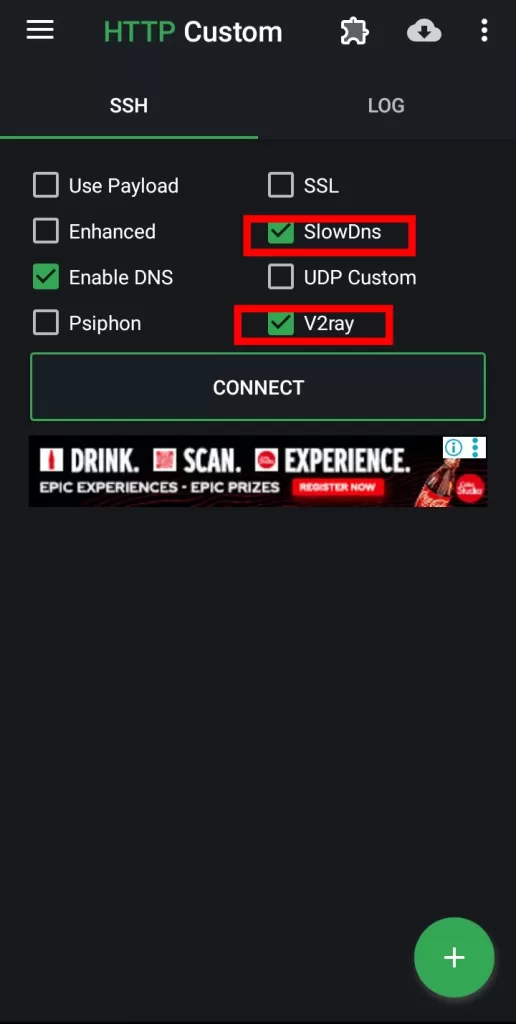
Step 3: Check Necessary Boxes
In the HTTP Custom app, ensure you check the “Sloans V2Ray” and other relevant boxes as shown on the screen. This enables the necessary features for your VPN setup.
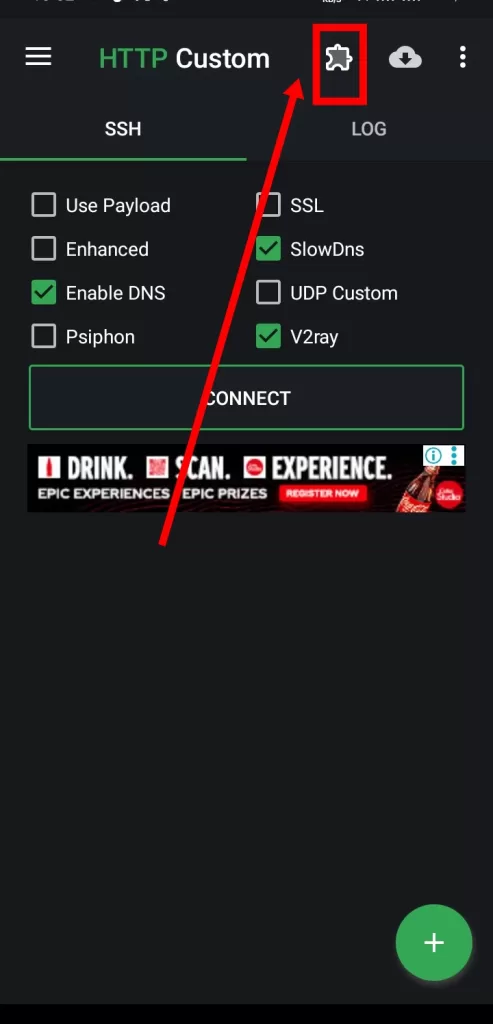
Step 4: Set Up V2Ray DNS Settings
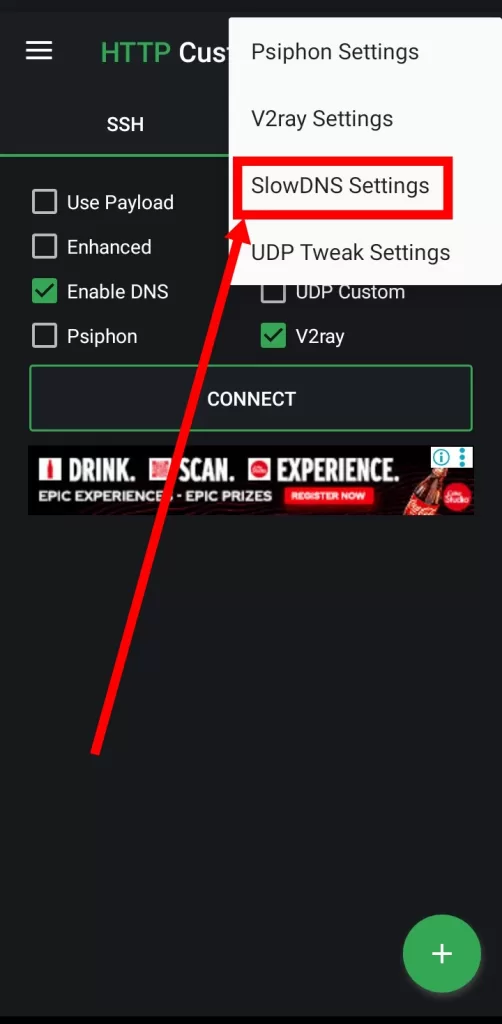
To configure V2Ray DNS settings, click on the plugin icon in the top left corner of the app.
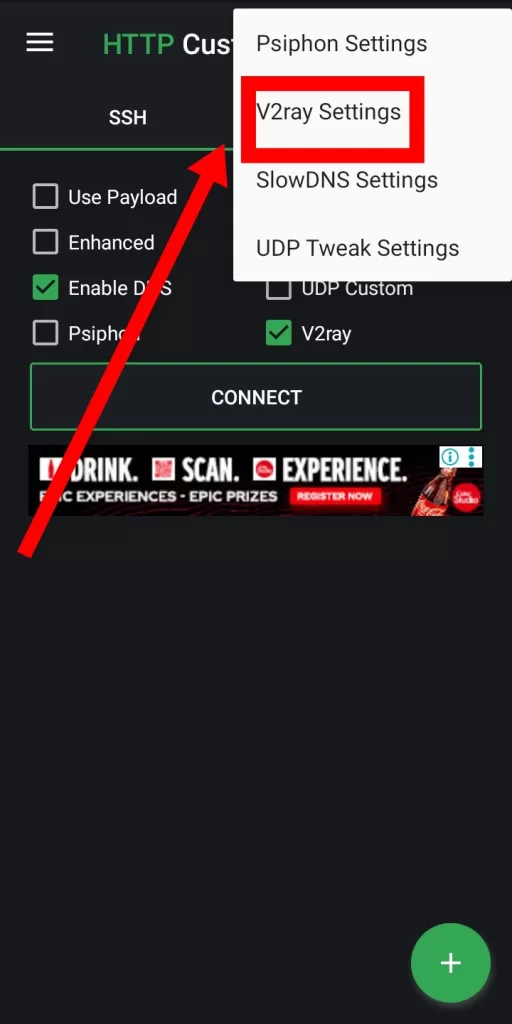
From there, select “V2Ray DNS” to begin the setup process.
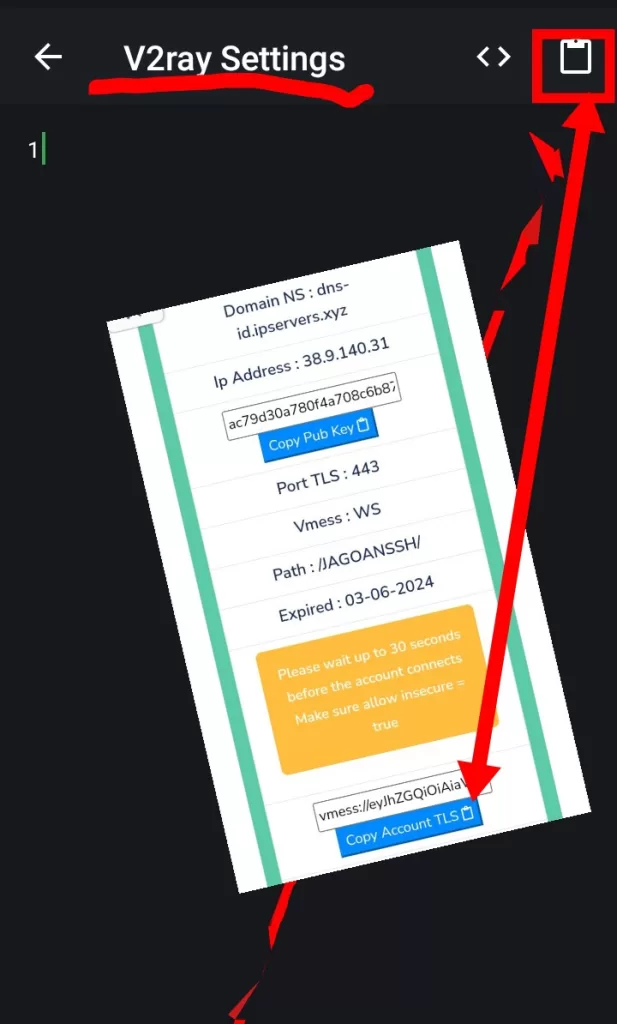
Step 5: Enter V2Ray DNS Code
Copy the V2Ray DNS or mess code from your notepad and paste it into the app by clicking on the clipboard icon in the top left corner. This ensures that your settings are correctly inputted.
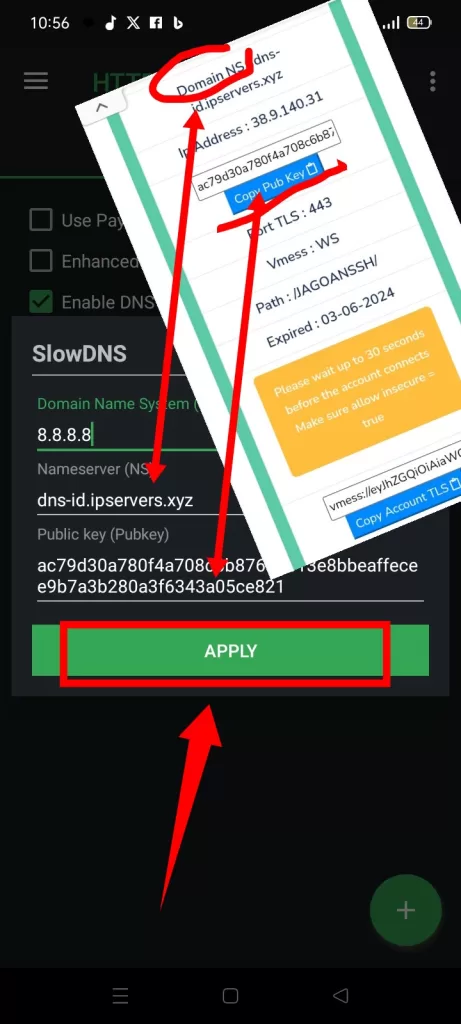
Step 6: Configure Slow DNS Settings
Next, you’ll need to set up the Slow DNS settings.
Copy the name server or DNS host and public key from your notepad. Paste these details into the respective boxes in the app. For the DNS, you can use Google DNS (8.8.8.8) or another reliable DNS address.
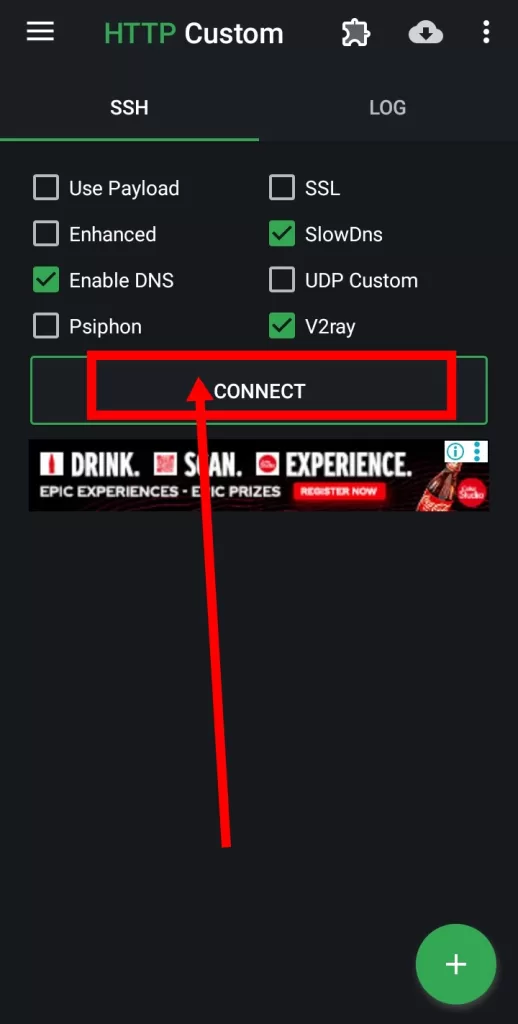
Step 7: Connect the VPN
With all the settings configured, click on the “Connect” button to start the VPN. This will initiate a secure connection using your V2Ray DNS setup.
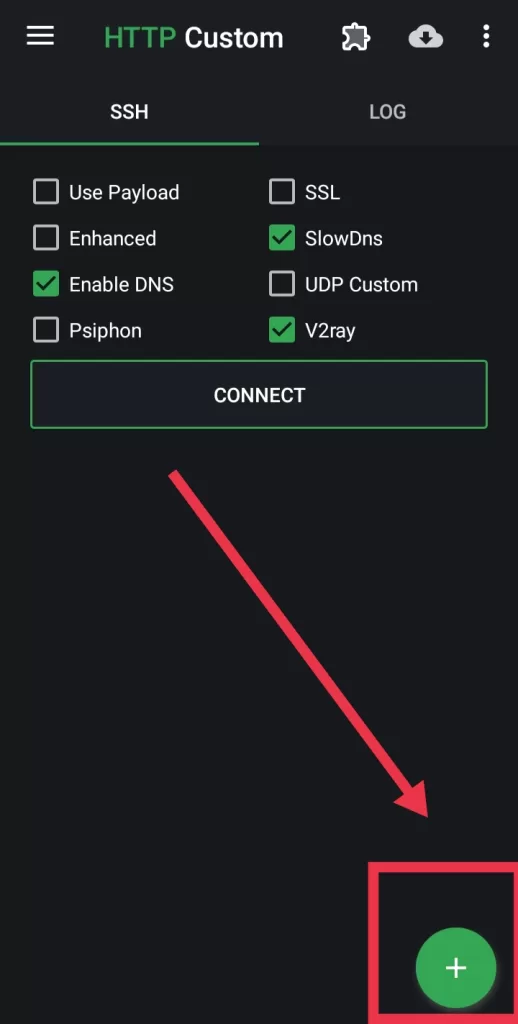
Step 8: Save the Configuration File
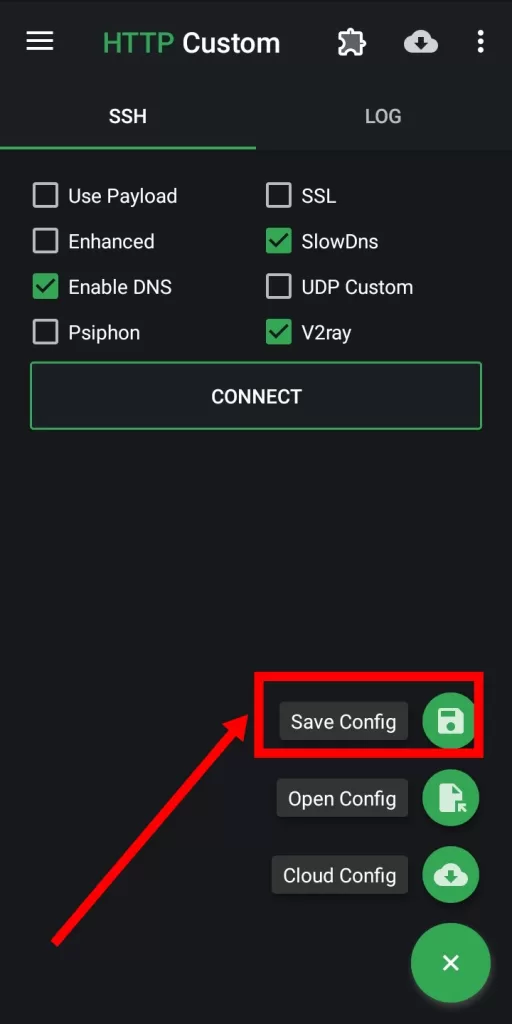
To save your configuration for future use, click on the plus sign (+)
and then select “Save File.”
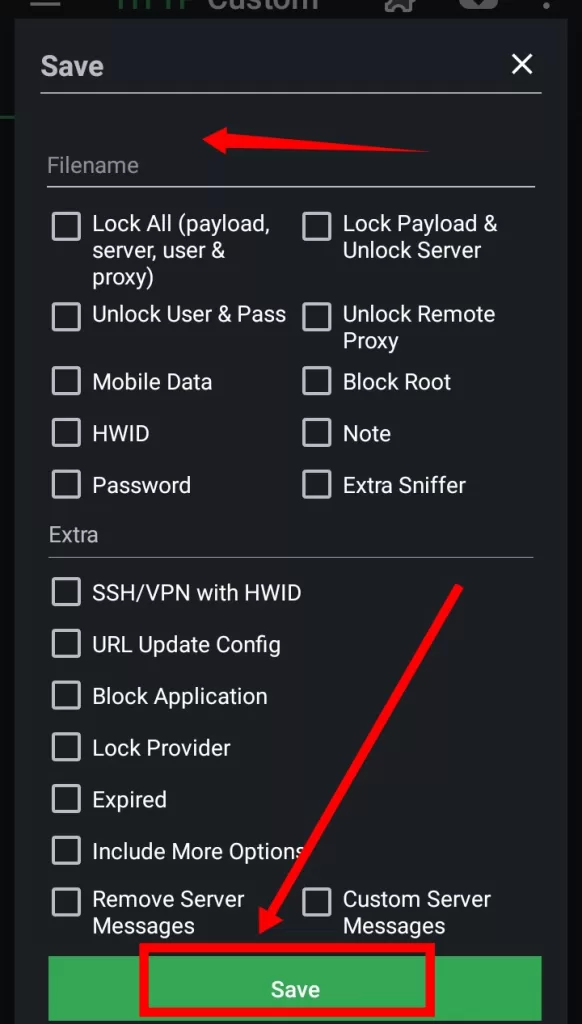
Give your file a name, and you can also choose to lock the file using the provided options. Click “Save” to finalize this step. This file can be reused later or shared with friends.
Conclusion
Thank you for following our tutorial on setting up V2Ray DNS on HTTP Custom VPN. If you found this guide helpful, don’t forget to subscribe to our channel for more tech tutorials and reviews. Stay tuned for more exciting content coming your way!
FAQs
Q: What is V2Ray DNS?
A: V2Ray DNS is a protocol used for secure internet browsing. It helps in bypassing internet censorship and protecting your online privacy.
Q: Why should I use HTTP Custom VPN?
A: HTTP Custom VPN provides a customizable VPN experience, allowing you to configure settings for enhanced security and privacy.
Q: Where can I find the V2Ray DNS code?
A: The V2Ray DNS code can be obtained from your V2Ray account setup. Check our previous video or tutorial for detailed instructions.
Q: Can I use a different DNS server?
A: Yes, you can use Google DNS (8.8.8.8) or any other reliable DNS server of your choice.
Q: How do I save my configuration file?
A: After setting up your VPN, click on the plus sign (+), then select “Save File.” Name your file, and optionally lock it, then click “Save.”
Q: What should I do if I face issues connecting the VPN?
A: Ensure that all settings are correctly configured. If issues persist, refer to our website or previous tutorials for troubleshooting tips.
For more detailed guides and troubleshooting, visit our website and join our platform for the latest updates. Happy browsing!