
New Fast SLOWDNS tunnel VPN WORKING All COUNTRY
As a senior network administrator, I frequently encounter scenarios where traditional VPNs are blocked or throttled. In such environments, tools like SlowDNS VPN, which leverage DNS tunneling, become invaluable for maintaining connectivity and safeguarding privacy. This guide provides a comprehensive, step-by-step walkthrough for deploying and configuring the SlowDNS VPN application, ensuring you can bypass restrictions and establish a secure connection with clarity and precision.
Table of Contents
- Understanding SlowDNS and DNS Tunneling
- Installing the SlowDNS VPN Application
- Navigating the Application Interface
- Configuring DNS Servers: Two Approaches
- Activating and Managing Your VPN Session
- Frequently Asked Questions (FAQ)
Understanding SlowDNS and DNS Tunneling
SlowDNS VPN operates on the principle of DNS tunneling, a method that encapsulates non-DNS traffic within DNS queries and responses. This technique is particularly effective in highly restricted network environments where traditional VPN protocols (like OpenVPN, WireGuard, or IPsec) are blocked, but DNS traffic is permitted. By leveraging DNS ports (typically UDP port 53), SlowDNS can covertly transmit data, effectively bypassing firewalls and censorship. While this method can be slower than conventional VPNs due to the nature of DNS resolution, it provides a robust solution for achieving connectivity when other options fail.Installing the SlowDNS VPN Application
- Step 1: Access Your Browser
Open any web browser on your mobile device or computer. - Step 2: Search for UDP Custom
In the browser’s search bar, precisely type “UDP Custom” and initiate the search. - Step 3: Navigate to the Official Website
From the search results, identify and tap on the official “UDP Custom” website link. Ensure you are accessing a legitimate source to prevent downloading malicious software. - Step 4: Locate the VPN Section
Once on the UDP Custom homepage, tap the menu icon (often represented by three horizontal lines or dots) and select the option labeled “All Country Working VPN.” - Step 5: Find SlowDNS VPN
Within the VPN section, utilize the search bar provided to type “Slow DNS.” This will filter the available applications. - Step 6: Download and Install
Tap on the SlowDNS VPN application listing to proceed with the download. Follow your device’s prompts to complete the installation process. Once installed, tap “Open” to launch the application.
Navigating the Application Interface
Upon launching SlowDNS, you will be presented with the primary dashboard. This interface provides crucial information and control options:- Data Usage: Displays your current session’s data consumption, typically starting at 0B.
- Connection Time: Shows the active duration of your VPN session.
- Default Server: Initially, this may display a default location, such as “United States, New York.” Tapping on this server name will reveal a list of available VPN server locations, including options like Canada, Germany, or Singapore. Select a server strategically, considering geographical proximity for optimal performance.
Configuring DNS Servers: Two Approaches
Effective DNS configuration is critical for SlowDNS VPN’s functionality. The application offers both simplified default options and advanced custom settings.Default DNS Configuration (Beginner-Friendly)
For users seeking a straightforward setup, SlowDNS provides pre-configured public DNS servers. These are generally reliable and easy to implement.- Step 1: Navigate to Custom DNS
On the SlowDNS home screen, locate and tap the “Custom DNS” option. - Step 2: Select a Pre-configured Server
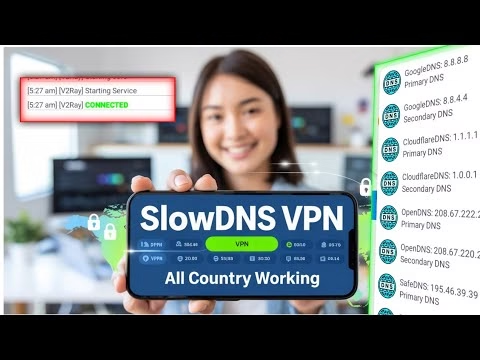
You will find common public DNS options listed, such as:- Google DNS:
8.8.8.8 - Cloudflare DNS:
1.1.1.1
- Google DNS:
- Step 3: Connect
After selecting your preferred DNS server, tap the “Start” button to initiate the VPN connection.
Advanced Custom DNS Setup
Advanced users requiring more granular control or specific DNS resolver preferences can opt for custom DNS settings. This allows for the use of specialized DNS servers that might offer enhanced privacy, security, or geo-unblocking capabilities.- Step 1: Choose Custom Slow DNS
From the DNS configuration options, select “Custom Slow DNS, DNST mod.” This option enables manual input of DNS server details. - Step 2: Enter DNS IP Address
In the designated field, enter the IP address of your chosen custom DNS server. For example, you might use an alternative Cloudflare IP:
or a privacy-focused DNS like Quad9:1.0.0.1
.9.9.9.9 - Step 3: Leave Other Fields Blank (Unless Specific Protocols)
Unless you are explicitly configuring advanced V2ray protocols or similar, it is recommended to leave any other configuration fields blank. Incorrect settings in these fields can disrupt connectivity. - Step 4: Connect
With your custom DNS IP entered, tap “Start” to establish the VPN connection.
Activating and Managing Your VPN Session
Once your DNS is configured, activating and managing your VPN session is straightforward.- Step 1: Initiate Connection
Press the prominently displayed “Start” button on the SlowDNS home screen to begin your VPN session. - Step 2: Monitor Session Time
The application will display a timer (e.g., “4A 29-6”) indicating your remaining VPN session duration. This duration may vary based on the app’s free tier limitations. - Step 3: Extend Session (If Needed)
Should you require additional connection time, look for an option such as “Add +4 HR” (or similar). Tapping this will typically extend your session, often by watching a brief advertisement.
Frequently Asked Questions (FAQ)
Q1: What is DNS tunneling, and how does SlowDNS utilize it?
DNS tunneling is a technique that encodes data from other protocols (like IP, TCP, or UDP) within DNS queries and responses. Since DNS traffic (typically UDP port 53) is almost universally allowed through firewalls, this method can circumvent network restrictions that block traditional VPN ports. SlowDNS leverages this by creating a covert channel over DNS, allowing your device to communicate with its VPN server even in highly filtered environments. Your regular internet traffic is encapsulated within these DNS packets, making it appear as legitimate DNS requests and responses to network monitoring tools.Q2: Why am I experiencing slow speeds with SlowDNS?
Slower speeds are an inherent characteristic of DNS tunneling. The process of encapsulating and decapsulating non-DNS traffic within DNS queries adds overhead and latency. Additionally, DNS records have size limitations, meaning data must be fragmented into smaller chunks, further reducing throughput compared to direct connections or conventional VPNs. **Troubleshooting Slow Speeds:**- Change Servers: Experiment with different SlowDNS server locations. Proximity to the server significantly impacts latency.
- Optimize DNS: Try different public DNS resolvers (e.g., 1.1.1.1, 8.8.8.8, 9.9.9.9) or even local DNS if performance is better.
- Network Congestion: Test during off-peak hours to see if local network congestion is a factor.
- ISP Throttling: While designed to bypass, some ISPs may still detect and throttle unusual DNS patterns.
Q3: My VPN isn’t connecting. What troubleshooting steps can I take?
Connection issues can arise from various factors. Here’s a systematic approach to diagnose and resolve common problems:- Verify Internet Connection: Ensure your underlying internet connection is active and stable without the VPN.
- Restart Application: Close and re-open the SlowDNS app.
- Clear App Cache: In your device’s app settings, clear the cache for the SlowDNS application.
- Try Different DNS Servers: Switch between default (8.8.8.8, 1.1.1.1) and custom DNS IPs. Sometimes a specific DNS server might be blocked or unresponsive.
- Change VPN Server Locations: If one server fails, attempt to connect to another available region from the list.
- Check for App Updates: Ensure your SlowDNS app is running the latest version. Outdated software can lead to connectivity issues.
- Firewall/Antivirus Interference: Temporarily disable any third-party firewalls or antivirus software on your device to rule out interference.
- Reinstall Application: As a last resort, uninstall and then reinstall the SlowDNS application.