

How to Set Up HTTP Custom for Your Psiphon Server
How to Set Up HTTP Custom for Your Psiphon Server
Welcome to our comprehensive guide on setting up HTTP Custom for your psiphon server. This tutorial is designed to walk you through the entire process step-by-step. Whether you’re a beginner or someone looking to refine their setup, this post has everything you need. Before diving in, make sure you’ve watched our previous video on creating a psiphon server.
Table of Contents:
- Introduction
- Step 1: Recap of Siphon Server Creation
- Step 2: Download and Launch HTTP Custom
- Step 3: Configuring the Home Screen Settings
- Step 4: Accessing Siphon Settings
- Step 5: Navigating to the Payload Section
- Step 6: Setting Up the Payload
- Step 7: Connecting Your VPN
- Conclusion
- FAQs
Introduction
In this blog post, we’ll guide you through the setup of HTTP Custom for your psiphon server. This setup will enable you to enhance your VPN experience with customized settings and improved security.
Step 1: Recap of PSiphon Server Creation
If you haven’t already, please watch our previous video on creating a psiphon server. Here’s a quick recap:
- Visit the website: This is where you can create your psiphon server.
- Select your desired server location: Choose a location that best fits your needs.
- Copy the necessary account details: You will need these details for the setup process.
Make sure you have these account details handy as we will use them in the next steps.
Step 2: Download and Launch HTTP Custom
The first step in setting up HTTP Custom is to download the app from the Play Store. If you haven’t already done so, follow these steps:
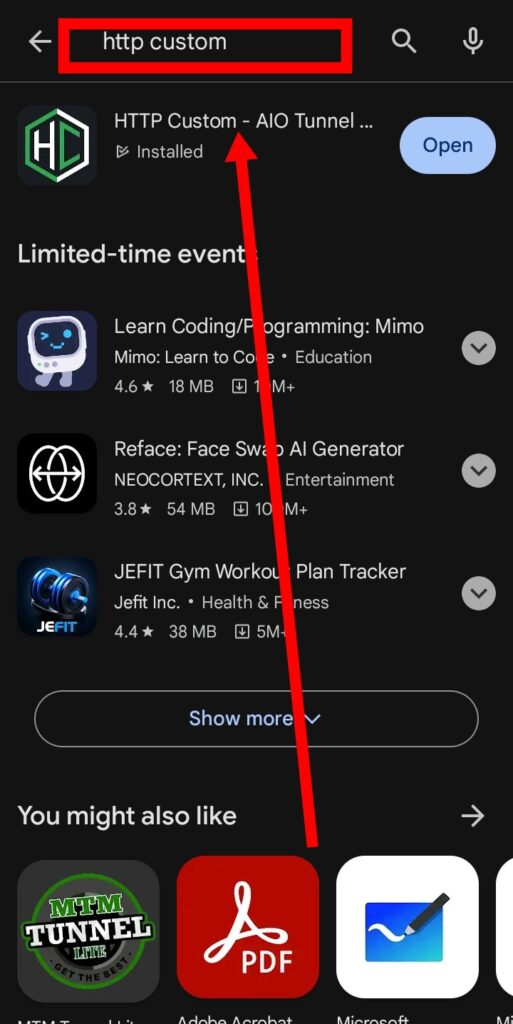
- Open the Play Store on your device.
- Search for “HTTP Custom”.
- Download and install the app.
- Launch the app.
Upon launching, you’ll be greeted with the home screen.
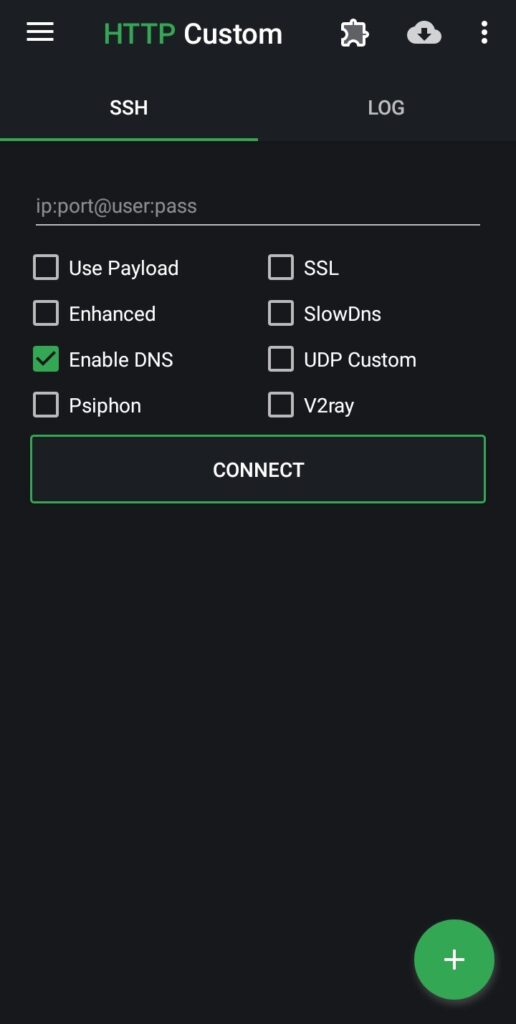
Step 3: Configuring the Home Screen Settings
On the home screen of HTTP Custom, you’ll need to configure some basic settings:
- Check the boxes for “PSiphon” and “Payload”.
- Adjust any other settings as necessary for your setup.
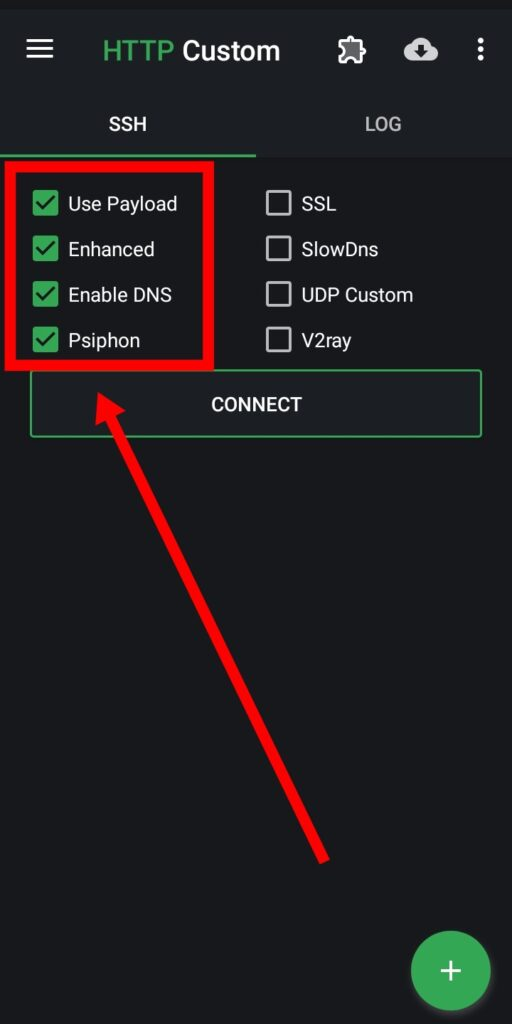
These settings will allow you to access the Psiphon settings later.
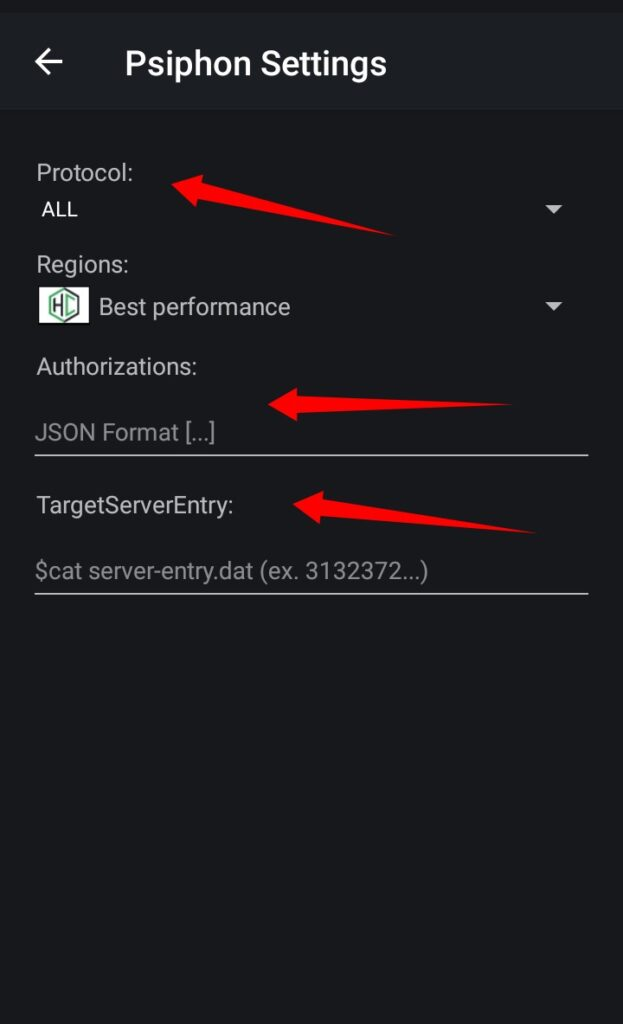
Step 4: Accessing PSiphon Settings
Next, you’ll need to access the siphon settings:
- Click on the plugin icon on the home screen.
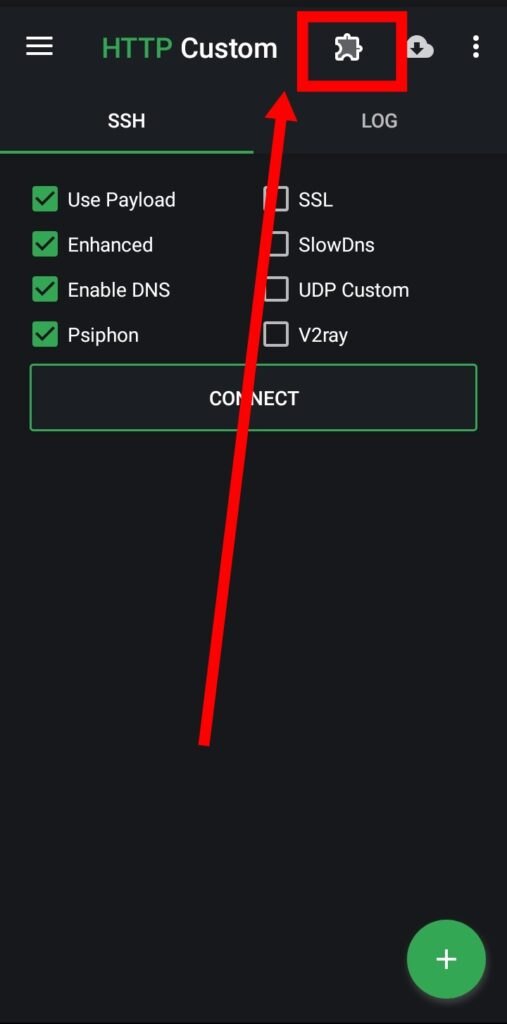
2. From the menu, select “PSiphon Settings”
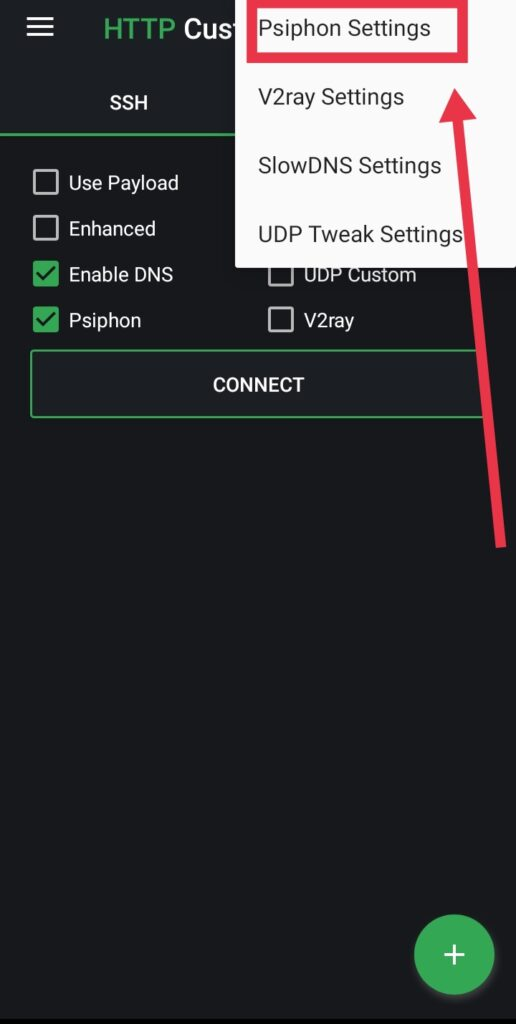
In this section, you will find various options such as protocols, region, authorization, and server. Unfortunately, due to YouTube’s policy, we cannot display these settings directly in the video.
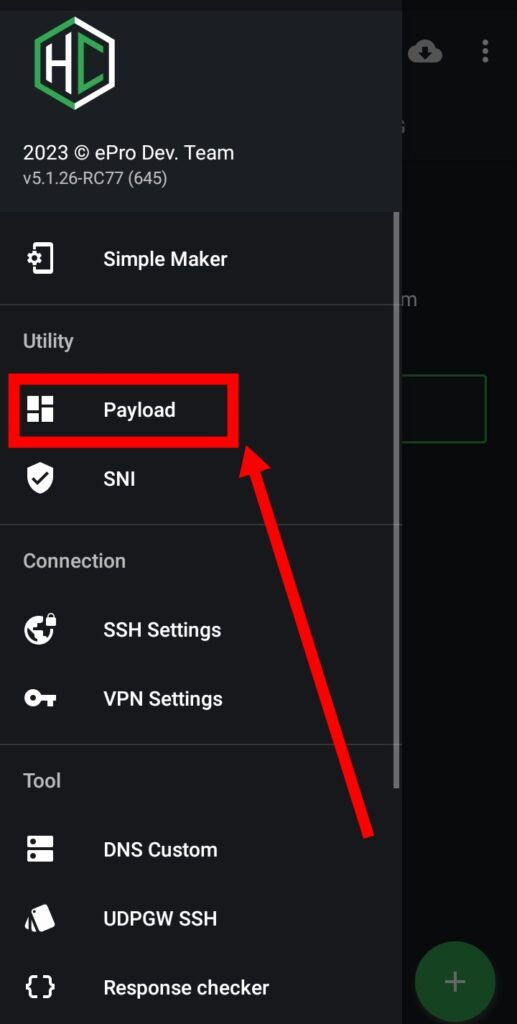
Step 5: Navigating to the Payload Section
To set up your payload:
- Click on the hamburger icon in the top left corner.
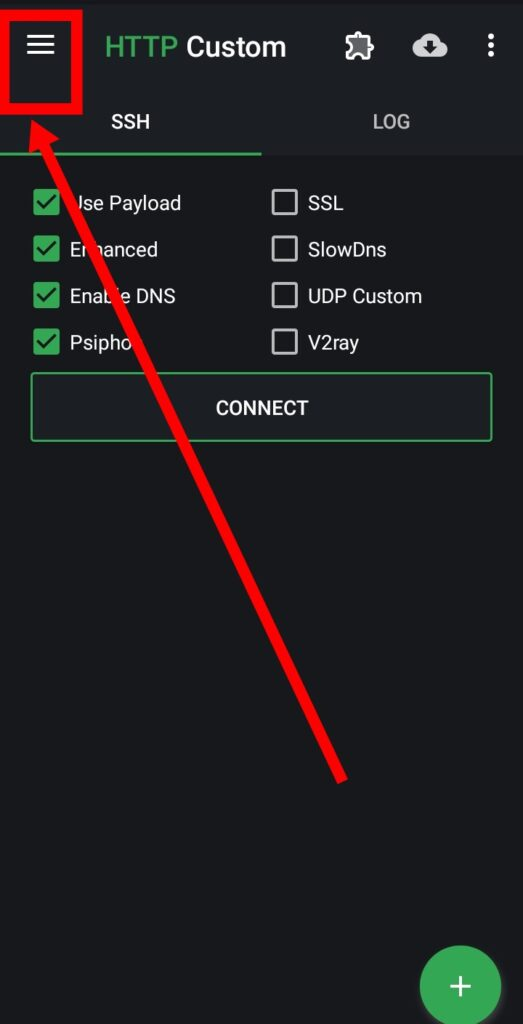
2. select “Utility.
3. Click on “Payload”.
Step 6: Setting Up the Payload
Setting up the payload
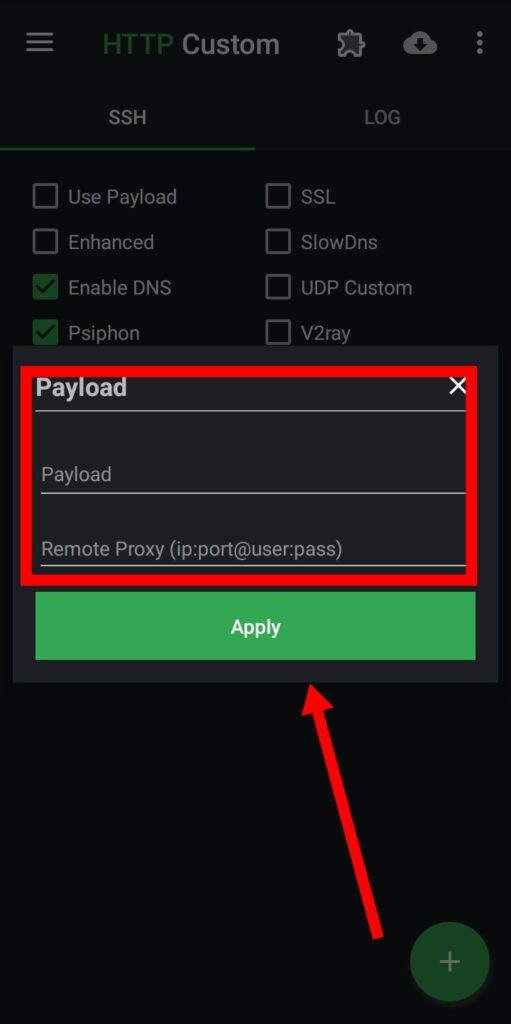
can be a bit tricky, and due to YouTube’s policy, we can’t share specific settings directly in the video. However, we’ve provided all the necessary details in a blog post. Please follow the link below for the complete tutorial:
Complete Payload Setup Guide
This blog post includes all the details you need to configure your payload and Psiphon settings properly.
Step 7: Connecting Your VPN
Once you have set up the payload and siphon settings, return to the app’s home screen:
- Click on the “Connect” button to start your VPN connection.
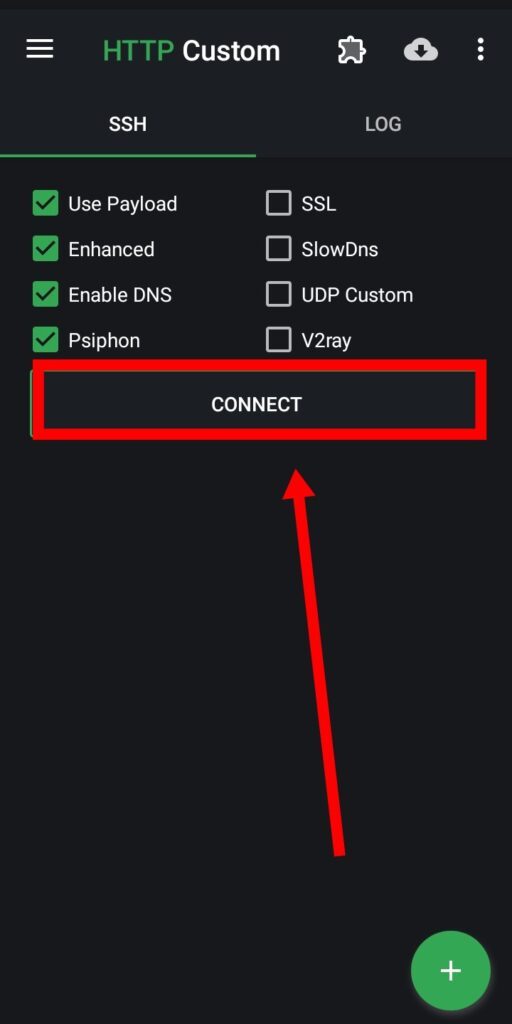
Congratulations! You have successfully set up HTTP Custom for your siphon server.
Conclusion
We hope this guide has been helpful in setting up HTTP Custom for your siphon server. Due to platform restrictions, we couldn’t share specific details within the video, but you can find everything you need in the provided blog link. If you found this tutorial useful, please share it and subscribe to our channel and blog for more tech tips and tutorials.
FAQs
Q1: Why can’t you share the specific payload settings in the video?
A1: YouTube’s policies restrict the sharing of certain technical details within videos. However, we’ve provided a complete guide on our blog.
Q2: Where can I find the detailed payload settings?
A2: You can find all the detailed settings in the blog post linked in the video description.
Q3: Do I need to configure anything else after setting up the payload?
A3: After configuring the payload and siphon settings, you should be ready to connect your VPN without any additional steps.
Q4: Can I use HTTP Custom on iOS devices?
A4: HTTP Custom is primarily designed for Android devices. For iOS, you may need to find a compatible alternative.
Q5: What should I do if I encounter connection issues?
A5: Ensure that all settings are correctly configured. Refer to our blog post for troubleshooting tips or leave a comment for further assistance.
Thank you for reading! If you have any other questions or need further assistance, feel free to reach out in the comments below or contact us through our social media channels.