
DroidVPN UDP settings in 2025
- Remote UDP Port: Input
53or9201(common open UDP ports). - Local UDP Port: Input
80or leave it blank/0 to randomize. - UDP Connection Mode: Select **Mode 1**.
- TCount (TC): Input
1or5000. - RCount (RC): Input
114or4.
- Save the settings and return to the home screen dashboard.
Step 3: Account Credentials & Connection
Open the side menu again and select **Account**. Enter your DroidVPN registered username and password. Choose an active server node from the server list, then click the central **Start** button. Approve the Android connection request. The client will establish a tunnel using your custom UDP settings, providing secure and optimized access.
Frequently Asked Questions
1. Why does DroidVPN show a “UDP Port is Blocked” error?
If your mobile operator blocks standard UDP traffic, the connection handshake will fail. To bypass this, change the Remote UDP Port to 53 (DNS port) or 9201. If Mode 1 fails, toggle the Connection Mode to *Normal*.
2. What is the difference between Mode 1 and Normal connection modes?
Normal connection mode establishes a standard UDP connection. Mode 1 is a custom protocol mode that sends packets in structured cycles (defined by TCount and RCount parameters) to bypass firewalls that block standard continuous UDP streams.
3. How do I get a free DroidVPN account?
Visit the official DroidVPN website in your browser, register with a valid email address, and verify your account. Free accounts include a daily bandwidth quota, which can be upgraded to premium for unlimited usage.
- Tap the menu icon in the top left corner and select **Settings**.
- Navigate to **UDP Settings**.
- Configure the following port fields:
- Remote UDP Port: Input
53or9201(common open UDP ports). - Local UDP Port: Input
80or leave it blank/0 to randomize. - UDP Connection Mode: Select **Mode 1**.
- TCount (TC): Input
1or5000. - RCount (RC): Input
114or4.
- Save the settings and return to the home screen dashboard.
Step 3: Account Credentials & Connection
Open the side menu again and select **Account**. Enter your DroidVPN registered username and password. Choose an active server node from the server list, then click the central **Start** button. Approve the Android connection request. The client will establish a tunnel using your custom UDP settings, providing secure and optimized access.
Frequently Asked Questions
1. Why does DroidVPN show a “UDP Port is Blocked” error?
If your mobile operator blocks standard UDP traffic, the connection handshake will fail. To bypass this, change the Remote UDP Port to 53 (DNS port) or 9201. If Mode 1 fails, toggle the Connection Mode to *Normal*.
2. What is the difference between Mode 1 and Normal connection modes?
Normal connection mode establishes a standard UDP connection. Mode 1 is a custom protocol mode that sends packets in structured cycles (defined by TCount and RCount parameters) to bypass firewalls that block standard continuous UDP streams.
3. How do I get a free DroidVPN account?
Visit the official DroidVPN website in your browser, register with a valid email address, and verify your account. Free accounts include a daily bandwidth quota, which can be upgraded to premium for unlimited usage.
For Android users looking to secure their network traffic and bypass geo-blocks, **DroidVPN** remains a highly popular client. DroidVPN supports multiple tunneling protocols, but configuring its **User Datagram Protocol (UDP)** parameters is the most effective way to maximize speed. Because UDP routes packets without requiring delivery acknowledgments, it drastically reduces connection latency, making it ideal for streaming and real-time browsing.
This technical guide details the installation of DroidVPN and the step-by-step optimization of its custom UDP port and connection settings for stable performance.
Table of Contents
- Video Tutorial
- Step 1: Installing DroidVPN on Android
- Step 2: Configuring Custom UDP Port Settings
- Step 3: Account Credentials & Connection
- Frequently Asked Questions
Video Tutorial
Step 1: Installing DroidVPN on Android
Obtain the DroidVPN client from the official Android repository:
- Open the Google Play Store on your device.
- Search for
DroidVPNand install the app. - Launch the application to access the main connection interface.
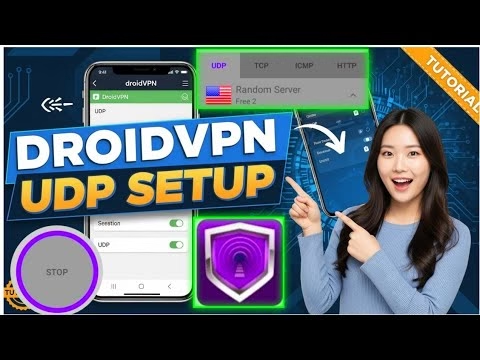
Step 2: Configuring Custom UDP Port Settings
To optimize DroidVPN’s transmission speed, manually configure the UDP port parameters:
- Tap the menu icon in the top left corner and select **Settings**.
- Navigate to **UDP Settings**.
- Configure the following port fields:
- Remote UDP Port: Input
53or9201(common open UDP ports). - Local UDP Port: Input
80or leave it blank/0 to randomize. - UDP Connection Mode: Select **Mode 1**.
- TCount (TC): Input
1or5000. - RCount (RC): Input
114or4.
- Save the settings and return to the home screen dashboard.
Step 3: Account Credentials & Connection
Open the side menu again and select **Account**. Enter your DroidVPN registered username and password. Choose an active server node from the server list, then click the central **Start** button. Approve the Android connection request. The client will establish a tunnel using your custom UDP settings, providing secure and optimized access.
Frequently Asked Questions
1. Why does DroidVPN show a “UDP Port is Blocked” error?
If your mobile operator blocks standard UDP traffic, the connection handshake will fail. To bypass this, change the Remote UDP Port to 53 (DNS port) or 9201. If Mode 1 fails, toggle the Connection Mode to *Normal*.
2. What is the difference between Mode 1 and Normal connection modes?
Normal connection mode establishes a standard UDP connection. Mode 1 is a custom protocol mode that sends packets in structured cycles (defined by TCount and RCount parameters) to bypass firewalls that block standard continuous UDP streams.
3. How do I get a free DroidVPN account?
Visit the official DroidVPN website in your browser, register with a valid email address, and verify your account. Free accounts include a daily bandwidth quota, which can be upgraded to premium for unlimited usage.