
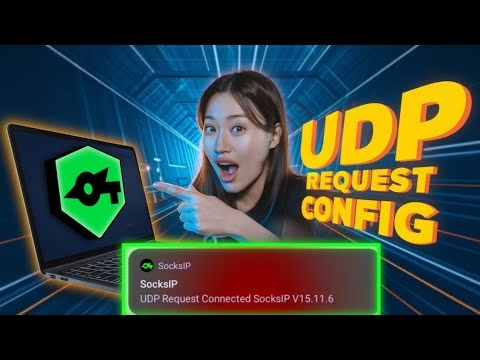
Create New UDP Request configs for Socksip TUNNEL
In an era where digital privacy and high-speed internet are paramount, leveraging advanced tunneling protocols has become a critical skill for network enthusiasts and privacy-conscious users alike. This guide delves into the precise methodology for establishing a robust and secure UDP Request server utilizing the SSHSSLTUNNEL platform, seamlessly integrating it with the SocksIP Tunnel client application. This configuration not only enhances your internet speed but also fortifies your online privacy by encrypting your data traffic over UDP, making it an invaluable technique for bypassing network restrictions and optimizing performance.
We will navigate through the server creation process, detail the specific configuration parameters required, and provide a step-by-step walkthrough for deploying these settings within the SocksIP Tunnel client. Whether you are a beginner seeking to optimize your mobile internet or an advanced user looking for enhanced security, this comprehensive guide provides the clarity and technical depth required to achieve a fast and secure online experience.
Table of Contents
- Understanding UDP Tunneling and Its Benefits
- Creating Your Premium UDP Request Server on SSHSSLTUNNEL
- Installing and Configuring the SocksIP Tunnel Client
- Initiating and Verifying the Secure Connection
- Frequently Asked Questions (FAQ)
Understanding UDP Tunneling and Its Benefits
UDP (User Datagram Protocol) tunneling involves encapsulating UDP packets within another protocol (in this case, often over an SSH/SSL-secured channel) to traverse networks that might otherwise block or throttle standard UDP traffic. While TCP is connection-oriented and ensures data delivery, UDP is connectionless, prioritizing speed and efficiency. This makes UDP ideal for real-time applications such as online gaming, VoIP, and streaming, where minor packet loss is acceptable in favor of low latency.
The SSHSSLTUNNEL platform facilitates the creation of a “UDP Request” server. This typically implies a custom implementation where UDP packets are wrapped within an SSH/SSL connection, providing both encryption and the ability to bypass restrictive firewalls that might inspect or block raw UDP traffic. When combined with a client like SocksIP Tunnel, users can achieve:
- Enhanced Speed and Low Latency: Optimized for rapid data transfer, reducing lag for time-sensitive applications.
- Improved Security: Data is encrypted through the underlying SSH/SSL tunnel, protecting privacy from eavesdropping.
- Bypassing Geo-restrictions and Throttling: By tunneling traffic, users can circumvent local network limitations and access content that might otherwise be unavailable.
Creating Your Premium UDP Request Server on SSHSSLTUNNEL
The first step in this process is to provision your dedicated UDP Request server through the SSHSSLTUNNEL platform. This server will act as the secure endpoint for your encapsulated UDP traffic.
Step 1: Access the SSHSSLTUNNEL Portal
Open your preferred web browser and navigate to the official SSHSSLTUNNEL website. Ensure you are accessing the legitimate domain to protect your credentials and server integrity.
Step 2: Select “Premium UDP Request” Server Creation
On the SSHSSLTUNNEL homepage, locate the navigation menu (often presented as a “hamburger” icon or a series of links). From the available options, select “Premium UDP Request.” This action will direct you to a server creation form.
Step 3: Generate Server Credentials
On the server creation form, you will need to provide the following information:
- Username: Create a unique username for your server. This will be used for authentication.
- Password: Establish a strong, secure password. Do not reuse passwords from other services.
- CAPTCHA Verification: Complete the reCAPTCHA challenge to confirm you are not a bot.
Once all fields are accurately filled, click the “Create Server” button. The system will process your request and generate your new UDP Request server within moments.
Step 4: Retrieve and Secure Server Details
Upon successful server creation, SSHSSLTUNNEL will display a comprehensive set of server details. It is imperative to copy all this information accurately. These details typically include:
- Server Hostname/IP Address: The address of your newly created server (e.g.,
udp.sshsstunnel.comor an IP address). - UDP Port: The specific port number on which the UDP Request server is listening (e.g.,
7300,7301,53, or443). - Username: The username you created.
- Password: The password you created.
- Request Payload/Method (if applicable): Some UDP Request implementations require a specific string or method for the initial connection. While the video does not explicitly mention this, be prepared for such an instruction if provided by SSHSSLTUNNEL.
Recommendation: Paste these details into a secure notepad application or a dedicated notes file. Verify their accuracy before proceeding to the next step.
Example Server Details:
Hostname:     udp-server-01.sshsstunnel.com
Port:         7300
Username:     mysecureuser
Password:     MyStrongP@ssword!
Request Type: Custom UDP (for SocksIP config)
Installing and Configuring the SocksIP Tunnel Client
With your UDP Request server details secured, the next phase involves installing and configuring the SocksIP Tunnel client on your Android device to establish the connection.
Step 1: Download and Install SocksIP Tunnel
- Open the Google Play Store on your Android device.
- Search for “SocksIP Tunnel.”
- Locate the official application and tap “Install.”
- Once the installation is complete, launch the SocksIP Tunnel app.
Step 2: Access Client Settings
Upon launching the app, you will typically be on the main VPN connection screen. To access the configuration options, tap on the gear icon, usually situated on the left-hand side of the interface.
Step 3: Select “UDP Request” Connection Type
Within the settings menu, navigate to the “Connection Type” or “Protocol” option. From the list of available protocols, select “UDP Request.” This configures the client to use the specific tunneling method your server provides.
Step 4: Input Server Details
Now, carefully transfer the server details you copied from SSHSSLTUNNEL into the corresponding fields within the SocksIP Tunnel app. The exact field names may vary slightly, but generally, you will need to populate:
- Server IP/Host: Enter the Server Hostname or IP Address (e.g.,
udp-server-01.sshsstunnel.com). - Server Port: Input the UDP Port (e.g.,
7300). - Username: Enter your SSHSSLTUNNEL username (e.g.,
mysecureuser). - Password: Enter your SSHSSLTUNNEL password (e.g.,
MyStrongP@ssword!). - Custom Payload/Request (if available): If SSHSSLTUNNEL provided a specific “Request Payload” or “Request String,” enter it here. For general UDP Request, this might be blank or auto-filled.
Double-check all entries for accuracy to prevent connection failures.
Step 5: Save Configuration
After entering all the details, locate and tap the “Save” or “Apply” button, then return to the main screen of the SocksIP Tunnel application.
Initiating and Verifying the Secure Connection
With the client configured, you are now ready to establish the secure UDP Request tunnel.
Step 1: Start the VPN Connection
On the main screen of the SocksIP Tunnel app, tap the prominent “Start” or “Connect” button. The application will attempt to establish a connection with your SSHSSLTUNNEL UDP Request server. You may be prompted to authorize the VPN connection on your Android device; grant this permission.
Step 2: Verify Connection Status
A successful connection will typically be indicated by a status change within the SocksIP Tunnel app (e.g., “Connected,” a green indicator), a persistent VPN icon in your device’s notification bar, and potentially connection statistics (upload/download speeds). To further verify, you can:
- Check IP Address: Use a website like whatismyipaddress.com to confirm your public IP address has changed to one associated with your server’s location.
- Perform a Speed Test: Use a service like fast.com or speedtest.net to assess your new connection speed and latency.
Congratulations! You are now connected to a fast and secure internet connection via the UDP Request protocol, leveraging the combined power of SSHSSLTUNNEL and SocksIP Tunnel.
Frequently Asked Questions (FAQ)
Q1: My SocksIP Tunnel client shows “Connecting…” indefinitely or “Connection Failed.” What should I troubleshoot?
A1: This is a common issue that can stem from several points. Here’s a troubleshooting checklist:
- Verify Server Details: Double-check the Server Host/IP, Port, Username, and Password in SocksIP Tunnel against the details provided by SSHSSLTUNNEL. A single typo can prevent connection.
- Internet Connectivity: Ensure your device has a stable internet connection (Wi-Fi or mobile data) before attempting to connect the VPN.
- Server Status: Log back into SSHSSLTUNNEL to confirm your created UDP server is active and not expired or suspended.
- Port Availability: While less common for UDP, some local networks or ISPs might block specific ports. Try generating a new server on SSHSSLTUNNEL with a different UDP port if available, or test with common ports like
443or53(if your provider allows UDP on these). - App Permissions: Ensure SocksIP Tunnel has all necessary permissions, especially for VPN connections and network access.
- Clear Cache/Reinstall: As a last resort, clear the app’s cache or even reinstall SocksIP Tunnel.
Q2: How does a UDP Request server differ from a standard OpenVPN UDP connection, and why choose it?
A2: While both leverage UDP for speed, a “UDP Request” server often implies a custom, often lightweight, tunneling mechanism designed to specifically carry UDP traffic. It typically involves a specific “request” or “handshake” payload at the start of the connection to authenticate and initiate the tunnel, which may differ from the standardized handshakes of protocols like OpenVPN.
- Customization/Obfuscation: UDP Request servers can be highly customized, making them effective for bypassing deep packet inspection (DPI) and censorship that might detect standard VPN protocols.
- Resource Efficiency: Sometimes, these custom tunnels can be lighter on system resources compared to full-fledged VPN protocols.
- Specific Use Cases: They are often popular in regions with highly restricted internet access or for specific applications where traditional VPNs struggle with performance or detection.
You choose it when standard VPNs are blocked, throttled, or you need maximum speed/low latency for specific UDP-heavy applications.
Q3: What are the security implications of using a UDP Request server, and how can I ensure my data is truly secure?
A3: The security of your data largely depends on the underlying tunneling mechanism used by SSHSSLTUNNEL to encapsulate the UDP traffic. If it’s truly an SSH/SSL tunnel as implied by the platform’s name, your data is encrypted between your client and the server, protecting it from most forms of eavesdropping by ISPs or local network administrators.
- Trust in Provider: Your data security also relies on the trustworthiness of the SSHSSLTUNNEL provider. Ensure they have a clear privacy policy and that the server infrastructure is well-maintained and secure.
- Strong Credentials: Always use strong, unique usernames and passwords for your server.
- No-Logs Policy: Ideally, choose a provider with a strict no-logs policy to ensure your connection activity is not recorded.
- Client-Side Security: Keep your SocksIP Tunnel app and Android OS updated to protect against known vulnerabilities.
While the tunneling encrypts your traffic, it doesn’t automatically anonymize your activities from the server provider itself. Exercise due diligence when selecting and using such services.