
How to create SOCKHTTP Plus SLOWDNS config
In modern network administration and censorship circumvention, DNS tunneling remains one of the most resilient methods for bypassing restrictive firewalls, captive portals, and deep packet inspection (DPI). SlowDNS is a protocol designed to encapsulate internet traffic within standard Domain Name System (DNS) queries, allowing users to establish secure connections over networks where all outgoing TCP/UDP ports are blocked except for DNS port 53.
This technical guide provides a step-by-step walk-through on how to configure SocksHTTP Plus—a powerful Android VPN client—with a free SlowDNS SSH tunnel generated via SSHOcean. By the end of this tutorial, you will understand the underlying mechanics of DNS tunneling, how to provision a secure endpoint, and how to optimize your client profile for maximum throughput and reliability.
Table of Contents
- 1. Understanding SlowDNS and DNS Tunneling
- 2. Installing SocksHTTP Plus VPN
- 3. Step-by-Step: Provisioning a Free SSH SlowDNS Account
- 4. Configuring SocksHTTP Plus Profile Parameters
- 5. Initiating the Connection and Diagnostic Log Analysis
- 6. Frequently Asked Questions & Troubleshooting
1. Understanding SlowDNS and DNS Tunneling
DNS Tunneling works by abusing the hierarchical, distributed nature of the Domain Name System. When an application attempts to access an external server, it translates the domain name into an IP address using recursive DNS resolvers. If a network blocks standard HTTP (80) or HTTPS (443) traffic, it must still allow DNS queries (UDP Port 53) to pass through to resolve internal or external hosts.
SlowDNS exploits this exception. The client software encodes raw IP packets into base32 or base64 subdomains (e.g., [encoded-data].tunnel.domain.com) and sends them to a local recursive DNS resolver as a query for a TXT, NULL, or CNAME record. The local resolver routes the query up the hierarchy until it reaches the authoritative Name Server (NS) of the tunnel domain. Instead of returning a standard IP, the NS server decodes the subdomain, extracts the payload, forwards the request to the destination web server, receives the response, and encapsulates the return traffic back inside DNS TXT or NULL records.
While SlowDNS is highly effective at bypassing severe network blockages, it is subject to high latency and overhead due to DNS packet styling, encoding limitations, and resolver-side rate limiting. Proper server selection and client configuration are vital to achieving a usable throughput.
2. Installing SocksHTTP Plus VPN
To begin the setup, you must install the SocksHTTP Plus client on your Android device. This application serves as the local VPN controller, routing your system’s IP routing tables through the slowDNS proxy loopback.
Method A: Google Play Store
- Launch the Google Play Store on your Android device.
- Use the search bar at the top to search for
SocksHTTP Plus. - Locate the official app developed by the UDP Custom team and tap Install.
Method B: Direct APK Installation
If your local network restricts access to the Google Play Store, or if the app is regionally locked, you can obtain the secure application package (APK) directly from the official web portal of the developer:
- Navigate to the official UDP Custom website using a mobile browser.
- Go to the VPN Section and download the latest release of the
SocksHTTP Plus APK. - Enable “Install from Unknown Sources” in your device’s security settings and execute the installation file.
Once installed, open the application to familiarize yourself with its interface. The primary dashboard displays connection states, custom payloads, and configuration selectors.
3. Step-by-Step: Provisioning a Free SSH SlowDNS Account
Because SocksHTTP Plus is a client-side utility, it requires a backend tunnel server to decode and forward your internet traffic. We will generate these credentials on SSHOcean, a platform that provides free SSH accounts optimized for DNS tunneling.
Step 3.1: Navigate to SSHOcean’s DNS Services
- Open your web browser (e.g., Google Chrome) and go to sshocean.com.
- Locate the menu icon (three horizontal stacked lines) in the upper right-hand corner of the landing page.
- Tap on Services to expand the sub-navigation options, then select SSH SlowDNS.
Step 3.2: Server Location Selection
DNS tunnel latency is highly dependent on geographic proximity. For optimal routing, select a server physically closest to your location:
- Review the active server list (e.g., United States, United Kingdom, Germany, Singapore).
- Analyze the current user load indicators. Choose a server with available capacity to prevent bandwidth throttling.
- Click Create Account next to your selected geographic node (for this guide, we will select a USA-based cluster).
Step 3.3: Generating Credentials
- In the configuration form, input a custom Username and a strong Password.
- Complete the reCAPTCHA verification to prevent automated abuse of the servers.
- Click Create. The backend script will initiate and output your custom account parameters.
Crucial step: Copy or take a screenshot of the completed account outputs. You will require all fields shown in the configuration dashboard below to configure the client properly.
4. Configuring SocksHTTP Plus Profile Parameters
With both the client installed and your tunnel credentials provisioned, you can now build a custom VPN profile within SocksHTTP Plus.
Step 4.1: Creating the Profile Container
- Launch the SocksHTTP Plus application.
- Locate the Plus (+) icon at the top right of the application header.
- From the contextual menu, tap Add Profile.
Step 4.2: Mapping SSH and SlowDNS Parameters
Input the credentials retrieved from SSHOcean into the correct configuration fields using the mapping matrix below:
| Form Field Name | Input Value / Mapping Source | Technical Purpose |
|---|---|---|
| Profile Name | e.g., US-SlowDNS-SSHOcean | Identifies the profile in the client dashboard. |
| SSH Server (IP / Host) | Your generated Host IP (e.g., 104.244.x.x) | The entry point of your target SSH tunnel. |
| Port | 22 (or designated SlowDNS port) | The listening SSH port on the server. |
| Username | The complete generated username | Authenticates your session with the daemon. |
| Password | The password set during registration | Secures your specific user session. |
| DNS / NS Domain | The generated Name Server (NS) Domain | Directs local DNS requests to the target NS resolver. |
| Public Key | The specific public key string (if provided) | Validates cryptographic authenticity to the remote end. |
Ensure that the tunnel connection mode is explicitly set to SlowDNS (or SSH + DNS depending on your app build version) to enable DNS request translation. Save the profile once you have verified these details.
5. Initiating the Connection and Diagnostic Log Analysis
Now that the profile is saved, you can connect the VPN and inspect your network traffic.
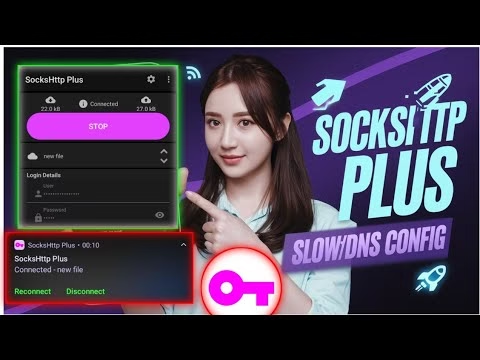
Step 5.1: Connecting the Profile
- Return to the home screen of the SocksHTTP Plus app.
- Tap the Profile dropdown selector and choose your newly saved profile (e.g.,
US-SlowDNS-SSHOcean). - Tap the primary Connect button.
Step 5.2: Analyzing Live Logs
To ensure your connection is routing properly, tap on the Log tab on the dashboard. The client output should display steps similar to the sequence below:
[12:00:01] SocksHTTP Plus starting...
[12:00:01] Running on Android SDK 33
[12:00:02] Local socks5 port: 1080
[12:00:02] Resolving DNS settings for SlowDNS interface...
[12:00:03] SlowDNS tunnel initiated with NS: ns-us1.sshocean.net
[12:00:04] Establishing secure cryptographic handshake...
[12:00:08] SSH Connection established successfully.
[12:00:09] Injecting DNS TXT payloads...
[12:00:10] VPN Connected: Local address routing established.
Once you see the VPN Connected confirmation message, your system’s outbound traffic is securely encapsulated within DNS queries and routed through your remote SSH server.
6. Frequently Asked Questions & Troubleshooting
Q1: Why is my SlowDNS connection speed significantly lower than my standard connection?
SlowDNS encapsulates IP packets into DNS query strings, meaning it suffers from high protocol overhead. Every transmission requires converting binary data into readable text domains, querying a recursive DNS resolver, and waiting for a TXT/CNAME response. To optimize speeds:
- Select a server with low user load and geographical proximity to your physical location.
- Adjust your DNS query size settings (TXT size) in the advanced options if supported.
- Verify that your local ISP’s DNS resolver is not bottlenecking or rate-limiting queries.
Q2: The log shows “Connection Timeout” or “Server Refused.” How do I troubleshoot this?
This error indicates that the local DNS resolver did not receive a response from the authoritative Name Server (NS). To resolve this:
- Verify the NS domain: Double-check that you did not make a typo when entering the NS domain from your SSHOcean account details.
- Switch target server IP: Sometimes, specific server IP nodes are blacklisted or undergo maintenance. Try generating an account on a different server node (e.g., France or Germany).
- Flush local DNS cache: Toggle Airplane mode ON and OFF to reset your device’s radio interface and clear its local resolver cache.
Q3: Can I run custom DNS servers (like 1.1.1.1 or 8.8.8.8) with SlowDNS?
No, you should not configure external static DNS servers like Cloudflare or Google DNS within the client unless specified by your SSH provider. SlowDNS requires queries to route directly through your ISP’s default local resolver, which forwards those queries up the DNS hierarchy to your specific tunnel’s authoritative Name Server. Forcing a static third-party resolver can break this routing chain and prevent the tunnel from connecting.