
How to Setup OpenVPN on HTTP Custom VPN | Fast and Secure Browsing Guide
- Ensure the **DNS Forwarding** checkmark is active to prevent DNS leaks.
- Verify the **Enable DNS** toggle is active, and select your preferred public DNS resolver (e.g. Google DNS or Cloudflare DNS).
Step 3: Importing OpenVPN Profiles (.ovpn)
OpenVPN requires configuration files (usually generated by an SSH/VPN provider). To import and connect:
- Select the **OpenVPN** option on the home dashboard.
- Select the import icon (the folder icon) in the menu, and choose the
.ovpnconfiguration file from your device storage. - Input your account username and password in the designated fields.
- Tap **Connect**. Accept the Android system VPN connection request. Once connected, your traffic will route through the secure OpenVPN tunnel.
Frequently Asked Questions & Troubleshooting
1. Why does my OpenVPN profile fail to parse inside HTTP Custom?
HTTP Custom requires standard configuration formats. If your .ovpn file contains unsupported parameters or syntax, it will throw a parsing error. Ensure the profile is clean and compatible with basic OpenVPN standards before importing.
2. What is the difference between TCP and UDP profiles?
UDP profiles are faster and consume less bandwidth, making them ideal for mobile gaming and streaming. TCP profiles guarantee packet delivery and are more effective at bypassing strict network filters, though they introduce slightly higher latency.
3. How can I verify my DNS is secure?
Once the connection is active, open your browser and go to dnsleaktest.com. Run a standard test. The page should list DNS server IPs associated with your VPN provider rather than your physical mobile network carrier.
- Tap the menu icon (three horizontal lines) in the top left corner of the dashboard.
- Select **VPN Settings** from the connection list.
- Verify the configurations:
- Ensure the **DNS Forwarding** checkmark is active to prevent DNS leaks.
- Verify the **Enable DNS** toggle is active, and select your preferred public DNS resolver (e.g. Google DNS or Cloudflare DNS).
Step 3: Importing OpenVPN Profiles (.ovpn)
OpenVPN requires configuration files (usually generated by an SSH/VPN provider). To import and connect:
- Select the **OpenVPN** option on the home dashboard.
- Select the import icon (the folder icon) in the menu, and choose the
.ovpnconfiguration file from your device storage. - Input your account username and password in the designated fields.
- Tap **Connect**. Accept the Android system VPN connection request. Once connected, your traffic will route through the secure OpenVPN tunnel.
Frequently Asked Questions & Troubleshooting
1. Why does my OpenVPN profile fail to parse inside HTTP Custom?
HTTP Custom requires standard configuration formats. If your .ovpn file contains unsupported parameters or syntax, it will throw a parsing error. Ensure the profile is clean and compatible with basic OpenVPN standards before importing.
2. What is the difference between TCP and UDP profiles?
UDP profiles are faster and consume less bandwidth, making them ideal for mobile gaming and streaming. TCP profiles guarantee packet delivery and are more effective at bypassing strict network filters, though they introduce slightly higher latency.
3. How can I verify my DNS is secure?
Once the connection is active, open your browser and go to dnsleaktest.com. Run a standard test. The page should list DNS server IPs associated with your VPN provider rather than your physical mobile network carrier.
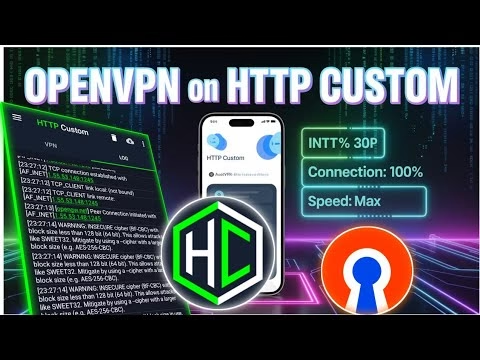
Deploying a secure connection often requires utilizing trusted, industry-standard protocols. While **OpenVPN** is a highly secure protocol, running it within the versatile **HTTP Custom** client allows you to leverage custom payload headers and proxy configurations. This combination provides a flexible network bypass, allowing you to secure all device traffic over UDP or TCP protocols.
This technical guide details the installation of HTTP Custom, how to configure its OpenVPN settings, and how to import configuration profiles step-by-step.
Table of Contents
- Video Tutorial
- Step 1: Installing HTTP Custom
- Step 2: Configuring VPN and DNS Settings
- Step 3: Importing OpenVPN Profiles (.ovpn)
- Frequently Asked Questions & Troubleshooting
Video Tutorial
Step 1: Installing HTTP Custom
First, install the latest client application package:
- Open the Google Play Store on your device.
- Search for
HTTP Customand install the client. - Open the application once installed.
Step 2: Configuring VPN and DNS Settings
Before importing configuration profiles, configure the connection settings:
- Tap the menu icon (three horizontal lines) in the top left corner of the dashboard.
- Select **VPN Settings** from the connection list.
- Verify the configurations:
- Ensure the **DNS Forwarding** checkmark is active to prevent DNS leaks.
- Verify the **Enable DNS** toggle is active, and select your preferred public DNS resolver (e.g. Google DNS or Cloudflare DNS).
Step 3: Importing OpenVPN Profiles (.ovpn)
OpenVPN requires configuration files (usually generated by an SSH/VPN provider). To import and connect:
- Select the **OpenVPN** option on the home dashboard.
- Select the import icon (the folder icon) in the menu, and choose the
.ovpnconfiguration file from your device storage. - Input your account username and password in the designated fields.
- Tap **Connect**. Accept the Android system VPN connection request. Once connected, your traffic will route through the secure OpenVPN tunnel.
Frequently Asked Questions & Troubleshooting
1. Why does my OpenVPN profile fail to parse inside HTTP Custom?
HTTP Custom requires standard configuration formats. If your .ovpn file contains unsupported parameters or syntax, it will throw a parsing error. Ensure the profile is clean and compatible with basic OpenVPN standards before importing.
2. What is the difference between TCP and UDP profiles?
UDP profiles are faster and consume less bandwidth, making them ideal for mobile gaming and streaming. TCP profiles guarantee packet delivery and are more effective at bypassing strict network filters, though they introduce slightly higher latency.
3. How can I verify my DNS is secure?
Once the connection is active, open your browser and go to dnsleaktest.com. Run a standard test. The page should list DNS server IPs associated with your VPN provider rather than your physical mobile network carrier.