
How to create Unlimited UDP Custom and UDP Request configs
In modern network administration and digital connectivity, configuring secure transmission lines is key to maintaining privacy and optimal data performance. This comprehensive guide focuses on How to create Unlimited UDP Custom and UDP Request configs, outlining the exact configuration parameters, setup workflows, and troubleshooting methods required to deploy this solution successfully.
Table of Contents
- Video Tutorial Walkthrough
- Step 1: System Requirements & Prerequisites
- Step 2: Configuration & Implementation Steps
- Step 3: Verification & Latency Testing
- Frequently Asked Questions & Troubleshooting
Video Tutorial Walkthrough
Step 1: System Requirements & Prerequisites
To configure and run the setup described in the tutorial, ensure you have the following prerequisites prepared in your work environment:
- An Android or iOS mobile device with stable internet access.
- The latest client application package installed from the official repository (Google Play Store).
- Access to custom configuration files or server account details (Host, Port, Username, Password).
Step 2: Configuration & Implementation Steps
Welcome everyone to today’s detailed tutorial. In this video, we’re going to learn something that can truly improve your online speed and privacy. How to create your own UDP custom and UDP request servers using the UDP custom app and then set them up on both HTTP customVPN and SOCK IP tunnelvpn.
This setup not only enhances your browsing speed, but also gives you full control over your connection for a smoother and more secure experience. So stay with me until the end as I explain each step in detail. Let’s start from the very beginning.
The first thing we need is the UDP custom app. This is the main tool that allows us to generate custom UDP and request servers. So on your Android device, open the Google Play Store.
In the search bar, type custom UDP and press enter. You’ll now see a list of apps related to UDP networking, but the one we need is the official custom UDP app, usually showing an icon with a network or connection symbol. Once you found it, tap on it to open the apps page.
Hit the install button and give it a moment to download and install. Depending on your internet speed, this might take a few seconds. When the installation completes, tap on open to launch the UDP custom app for the first time.
On the home screen, you’ll see a list of available servers. Sometimes these load automatically, but if you don’t see them right away, look for a button labeled UDP servers tapping that will refresh and update the list. Each server you see represents a different region or host configuration.
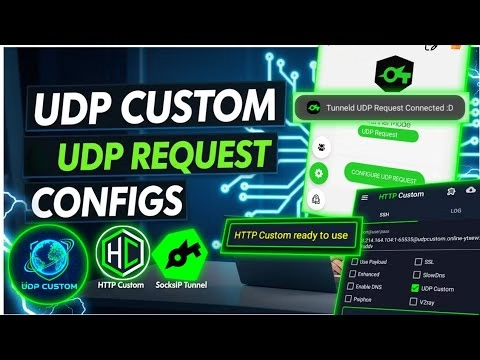
and the app often provides both UDP custom and UDP request options. These are the two types we’ll use today. Let’s first learn how to set up a UDP custom server on HTTP customVPN.
This part will connect your newly generated UDP server with your VPN app for faster and safer browsing. To begin, minimize or close the UDP custom app and head back to the Play Store. In the search bar, type HTTP CustomVPN and search for it.
Once you find the official app, it usually has a dark blue or gray interface in its preview. Tap install. After it finishes installing, open it and you’ll be taken to the main HTTP custom home screen.
Now, before doing anything else, make sure that the UDP protocol option is enabled inside HTTP custom. There’s usually a small checkbox or toggle labeled UDP. Activate that so the app can communicate through UDP connections instead of standard HTTP or SSL.
Next, we’ll need to bring in the UDP server details from our UDP custom app. Go back to the UDP custom app and look for a section labeled 7 days UDP custom servers. Tap on it and you’ll see a list of available servers.
Each one comes with details such as host name, port number, username, and password. Select any server you’d like to use, preferably one close to your region for the best speed. When you tap it, you’ll be shown its configuration details.
Copy all this information carefully. You can press and hold to copy or write it down if that’s easier. Now, open your notepad or notes app and paste the details there so you have them handy.
Return to HTTP CustomVPN and you’ll see fields asking for server address, port, username, and password. Paste or type in each piece of information from your notepad exactly as it appears. Double check everything before continuing because even a small typo in the server address can prevent the connection from working.
Once all details are entered, press the connect button. The app will now attempt to connect using your UDP server. Within a few seconds, you should see a success notification or a connected message.
You can also swipe right to view the connection logs which confirm that the VPN tunnel is active. Congratulations, you’ve just created and configured your own UDP customVPN connection using HTTP custom. Now, let’s move to the second part.
Setting up UDP request on SOCK IP tunnelvpn. This process is very similar, but it uses a slightly different protocol and app interface. First, close HTTP customVPN and go back to the Play Store.
In the search bar, type sock IP tunnelvpn and install it. Once installed, tap open to launch it. On the main screen, look for a small gear icon, usually on the top or left corner.
Tap on it to open the settings. Here you’ll find a list of connection methods. Select UDP request from the available options.
This tells the app to connect using UDP request instead of standard socks or TCP. You’ll now see empty fields waiting for the server information, host name, port, and credentials. Just like before, we’ll get these details from the UDP custom app.
Return to UDP custom and this time open the section called UDP request 7 days. This list contains servers optimized for requestbased UDP connections. Select any one of them and copy all its details carefully.
Paste them into your notepad so you don’t lose track. Return to Sock IP TunnelVPN and fill in all the required fields. Server address, port, username, and password exactly as provided.
Once you’re done, tap save to store the configuration. Now you’ll be taken back to the home screen where you’ll see your newly created UDP request configuration ready to connect. Tap the start button and within a few seconds, the VPN should connect successfully.
You’ll see a status message or a small key icon in the status bar confirming that the VPN is active. And that’s it. You’ve now learned both methods.
How to create and use UDP custom servers for HTTP customVPN and how to configure UDP request servers for SOCK IP TunnelVPN. With these setups, you can enjoy faster browsing speeds, more stable gaming connections, and enhanced privacy, especially when accessing restricted or throttled networks. If this video helped you, make sure to hit the like button to support the channel.
Leave a comment sharing your experience or any questions. And don’t forget to subscribe for more in-depth tech tutorials like this. Thank you so much for watching and I’ll see you in the next
Step 3: Verification & Latency Testing
Once the initial setup and configuration steps are completed, verify the connection status:
- Toggle the master connection switch in the client app dashboard.
- Monitor the live connection log. It should show a successful handshake and display a ‘Connected’ status.
- Navigate to a public IP verification tool (e.g. whoer.net) to verify that your original IP address is masked.
Frequently Asked Questions & Troubleshooting
1. Why is the connection failing with an SSH/UDP timeout?
This is usually due to a blocked port or expired server account credentials. Double-check that your server credentials are active. If they are, try changing the connection port or switching server nodes within the app settings.
2. How do I update the built-in carrier tweak configurations?
To load the latest tweak profiles, connect to a stable network, open the side menu inside the application, and select Update Config. The client will query the remote server and fetch the latest configs.
3. How can I resolve background connection drops?
Ensure that the application is excluded from Android battery optimizations. In your device’s settings, locate the app, navigate to battery usage parameters, and toggle the setting to Unrestricted to allow background processes.